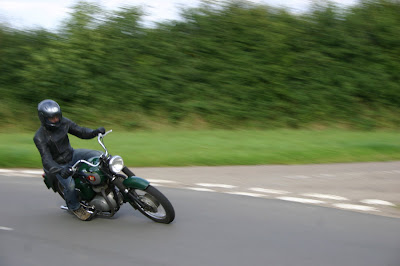
Tuesday 8 December 2009

Here's how the tank started out


Note healthy dose of scars, dents and scrapes in what is probably the original metallic red paint job from 1966. Sad to see all that history go in a way, but now she's ready for another 40 years.

Saturday 5 December 2009

A 650 quid paint job


Progress has been slow due to continued rotator cuff nonsense, but I've now got the tinware grit blasted by the excellent Peter Boonham at Summit Blast Cleaning in Easton (01480 891696), on the recommendation of motorcycle-friendly body shop AJ Cobb in Hilton (ajcobb.com).

Peter de-rusted and etch primered the mudguards, rear light unit, side panels, chain guard, fork legs and a few miscellaneous brackets for £65. Adrian Cobb agreed to paint it all, filling in the dents and scrapes, and refinishing the tank, for £650 plus VAT. It's a hell of a lot of money but this is top quality work, with painstaking use of filler, baking the undercoat on at 80C, much rubbing down, then painting and polishing (and more rubbing and baking).

The result is liquidly beautiful. This cameraphone snap hardly does it justice, but things should look better once the bike is rebuilt.

Sunday 18 October 2009

A grand day out


Back from the Stafford Show and it's been the best day's shopping I could have imagined. Every part I needed for the stricken A50 was there. Total outlay: £340.

The redoubtable Mr Seeley provided expert guidance on how to lurk, pounce and haggle, and by early afternoon, snuffling around in boxes like a pig questing for truffles, I turned up an original teardrop tank badge to replace the one that broke. Better still was a pretty decent tank for £85, though the later filler cap was another £15. Even Diplomat came round on Sunday morning to look at the treasure trove.

Kidderminster Motorcycles provided most of the headlamp assembly stuff. They were hugely knowledgeable. I was also impressed by Bantam John's stock. You can get chromed, Indian-made tanks for the A7, A10, Gold Star and maybe a few others but they haven't yet started on the A50/A65.

The whole atmosphere of the place was one of thousands of blokes milling around rooting for bits or dreaming about their next project. It's amazing what jolts through your brain when you see even a sidepanel from your first bike. I felt huge pangs of desire for an old KH250 (a mere £600 with original exhausts), not to mention various XT500s and even another old BSA. It made up for the food being the usual dogburger standard of yesteryear.

Having stored all the new parts away I spent Sunday afternoon ripping into the bike to get the forks ready for straightening. This is harder than it sounds when only one arm works properly, but I am pretty certain now we have enough to put the old fossil together in a day. Only remaining problem is finding someone to do the paintwork for not too much.

Wednesday 7 October 2009

A 50 year-old jigsaw


First job: assess the damage. Enter my friend Alan Sealey, a long time contributor to Classic Bike and Brit bike boffin. He rolled up the other night on his orange metalflake 750 Commando and, powered by nothing more than tea and a desire to see good done, inspected the stricken A50.

I would like to say I helped, but I didn't. Seven weeks after the crash my torn rotator cuff still doesn't even look like working. The legs, however, are more or less OK (the pic, included for purely voyeuristic reasons, shows them a few days after the event).

The full horror is thus:

New parts needed:
Switchgear
Clutch lever and clamp
Cowhorn handlebars, as preferred by owner Fee
Headlamp brackets and shell
Fork stanchions
Seat cover
Left footrest
Petrol tank
Sidepanel and front mudguard repaint

Check:
Yokes

Advisable:
Steering damper and lockstops

Alan has plenty of ideas about where to get this stuff. First stop is the autojumble at the Stafford show on October 17th.

Sunday 27 September 2009

Fixed – and broken again


Several non-blog months have elapsed, but work on the crusty old A50 continued to the point where it ran sweetly, got an MOT and did 500 shakedown miles. I hooked up the alternator, repainted lots more bits, fitted head bearings, aligned the wheels, sorted the carb and fuel taps, and discovered that it needed a 35A fuse.

Finally there was nothing left to do but ride it 350 miles to Fee's place in Cornwall to give it back. 30 miles from my destination, doing about 35mph, I hit a series of white-painted rumble strips on the entry to St Blazey near Cornwall. As I was stretching back at the time (the riding position is agony after 320 miles) I didn't have a good grip on the bars and it instantly went lock to lock. I baled out as it flipped full right, and landed on my arm, tearing the rotator cuff in my left shoulder. This injury is not recommended.

The bike was insured via Classic Bike magazine, but CB's owners charge the full cost of the claim to the editor's budget, which is effectively a form of blackmail. If I get it done properly in a shop Hugo Wilson, who is a good friend of mine, will be unable to make his magazine. So I will do the rebuild myself, and CB's costs stay at the minimum.

More on this sorry tale when my arm works well enough to wield a spanner.

Sunday 22 February 2009

Hammerite vs Plastikote


In the course of tarting up various bedraggled bits I tried both these aerosols in gloss black, on surfaces with most of the rust rotary brushed off, and treated with Jenolite, but otherwise unprimed. You'd think the Hammerite would be the best but it seemed a bit thin. Even after four coats you could still see the underlying metal on the edges of the shock mounts, for example. The cheaper Plastikote (c.£6 vs c.£9 for Hammerite) has a lot more covering efficiency.

According to the labels both paints contain enough VOCs to fry the eyes of every baby seal within a 50 mile radius, but Hammerite is far less obnoxious to use. The chemicals coming off the Plastikote make your head swim in seconds. Hammerite also has more of an enamel look to the finish. Plastikote is super shiny – something you may feel is out of place on an old Brit shonker.

The pics show the swing arm  affected by Fee's original Cornish maritime rust, and the same item after a bout of rotary wire brushing and two coasts of plastikote. After a month it's dried rock hard.

Tuesday 3 February 2009

Now in high resolution

You can download a hi res of the diagram on http://www.mediafire.com/?sharekey=28d9934ccbdf5306ab1eab3e9fa335ca3844f2d1a0c32910

A proper wiring diagram (I think)


Half way through doing the loom I got so hacked off with the standard BSA wiring diagram that I drew my own, along the lines of the Japanese ones I'm used to. This at least shows roughly where the different electrical components are on the bike.

Drawing a wiring diagram is harder than it looks but as far as I can tell this is electrically identical to the original, and to what is on the bike now. It certainly all seems to work (bar the charging system – some rear mudguard paintwork issues mean I've not had it running yet).

The red letters denote deviations from the standard BSA colours. There were a few decent bits of wire on the bike which served peripheral items, and as long as you leave a record to show the next owner what's what then I reckon you've discharged your social responsibility. Black dots show a connector join with different coloured wire either side.

The ignition switch is non standard and doesn't make the connections of the original, so the quaint 'emergency' position, intended to allow the motor to fire with a flat battery, is redundant on this bike. My justification for this act of historical auto electrical vandalism is that I don't plan to leave the lights on all night.

If by some staggeringly small chance anyone would like a civilised wiring diagram for a 1962 BSA A50/A65 running 12V electrics, here it is.


STOP PRESS: This diagram is now available in colour on this blog, Jan 2010. And in a further improved version in Jan 2012 here: http://oldbikehack.blogspot.com/2012/01/bsa-a50a65-wiring-diagram.html

Thursday 15 January 2009

A rescued BSA


This is the first Brit bike I've ever had in my garage. It's a 1962 BSA A50, which means it's as old as me, although (unless there's something I don't know) it's in considerably worse nick. It belongs to Fee, a friend in Cornwall, who keeps it in a shed round the back of her house, where it avoids most of the sea spray unless there's a serious storm whipping up. When it finally refused to start I offered to have a look.
I've sniffed around a few musty bikes in my time but the hum off this one is quite something – a miasma of three parts old oil, eighteen parts mould, and a generous dash of despair. The period factory manual, if anything, is even niffier. No matter.
It didn't take long to figure out the problem. The wiring was held together with the ubiquitous crap pre-insulated red and blue fasteners and bits of tarnished cable, none of which resembled the colours in the manual. My favourite touch was two alternator wires twisted together and rubbing on the crankcase.
Being used to Japanese electrics I took a while to grasp the stone age simplicity of switched alternator coils, and a brake light and horn which work even with the ignition off.
But eventually I figured out what I needed and ordered up the right coloured cables from the excellent Vehicle Wiring Products. The horn, rectifier, zener diode and switchgear all test OK, and Fee thoughtfully added Boyer Bransden III ignition at some point. I've now set to converting all the connectors to Japanese bullet spec. Total cost so far: about £15.
I must admit I find the whole thing strangely satisfying.